
Film it, open it, slow it down. A simple workflow for reviewing movement and technique.
Coaches, athletes and dancers have long used video to study movement. Today, almost everyone has a camera that can record good-quality video. What you need next is a simple way to watch it slowly, repeat key moments and pause on important positions. This guide shows how to use slow playback, loop and quick jumps to review sports technique and other movement.
Why slow-motion review works
Movement is faster than perception
Many key movements, such as the moment a racket hits a ball or a foot lands, last only a fraction of a second. At normal speed, the eye sees a blur.
Feedback you can see
Seeing your own movement helps you compare what you think you are doing with what you are actually doing.
Repeatable observation
Unlike a live session, a video can be watched again and again, from the same angle, at different speeds.
Recording video for slow review
Frame rate
- 30 fps – fine for 0.5× review.
- 60 fps – smoother at 0.5× and acceptable at 0.25×.
- 120 fps or higher – very smooth slow motion, larger files.
Camera position
- Film from the side to see body angles and positions.
- Film from the front or behind to see alignment.
- Keep the whole movement in the frame.
Stability and light
- Use a tripod or lean the phone against something solid.
- Record in good light to reduce motion blur.
- Avoid zooming while recording.
Keep clips short
Short clips are easier to load, loop and compare. Record each attempt as a separate clip if possible.
Loading your video
- Copy the clip from your phone to your computer, or open the site on your phone.
- Open the Video Speed Controller.
- Click Choose a video or drag the file onto the drop area.
Your video is processed in this browser. The video file is not uploaded to our server.
A step-by-step review workflow
Step 1: Watch at normal speed
Watch once at 1× to see the movement as a whole and its rhythm.
Step 2: Slow to half speed
Click 0.5×. Watch the whole movement again and note the main phases.
Step 3: Turn on loop
Click the loop button so the clip repeats. Watch several times without touching anything.
Step 4: Focus on the key moment
Switch to 0.25× for the critical moment, such as contact, take-off or landing.
Step 5: Pause on positions
Press K to pause at important positions. Use J and L to jump back and forward 5 seconds.
Step 6: Compare with a model
Compare your positions with a coach's demonstration or a reference video, at the same speed.
Speeds for different purposes
| Speed | Use it for |
|---|---|
| 1× | Overall rhythm and timing |
| 0.75× | Flow and sequence of movement |
| 0.5× | Phases of the movement |
| 0.25× | Contact, release and landing points |
Examples by activity
Racket sports
- Slow to 0.25× around contact to see the racket face and body position.
- Use 0.5× to check footwork before and after the shot.
Golf
- Use 0.5× for the full swing.
- Use 0.25× around impact.
- Pause at the top of the backswing.
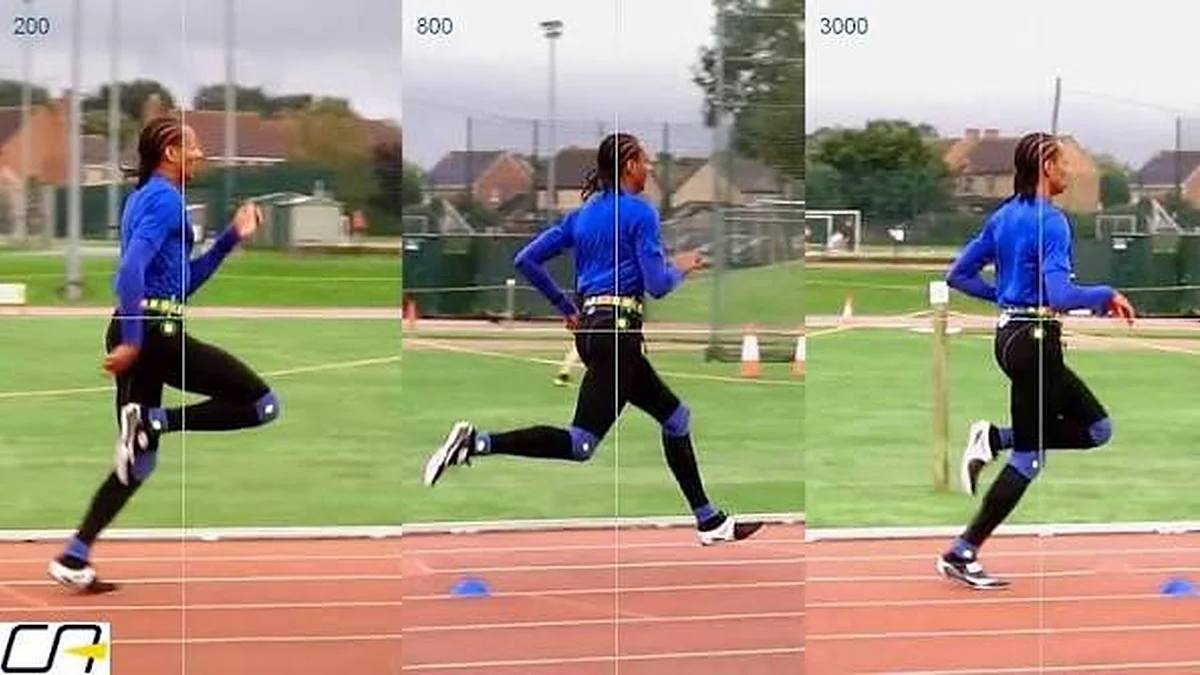
Running
- Use 0.5× to see foot strike and arm swing.
- Film from the side on a flat surface.
Football and team sports
- Use 0.5× to review a passing or shooting technique.
- Use 1× and 1.5× to review game footage and positioning.
Dance
- Learn choreography at 0.5× with loop.
- Increase speed with D as you improve.
Music performance
- Watch your hand position at 0.5×.
- Turn off Keep audio pitch natural if you want to hear the uncorrected sound.
Making improvements over time
Record regularly
Record the same movement every week from the same position. Comparing clips shows progress.
Focus on one thing at a time
Choose one point to work on in each session, such as knee angle or follow-through.
Keep notes
Write down what you noticed and what you will try next time.
Phone recordings and HEVC
Many phones record high-quality video in HEVC. If your clip shows only audio, or will not play, change your camera setting to "Most Compatible" or H.264, or convert the clip. See MP4, WebM and codecs.
Privacy for training videos
Why privacy matters
Training videos often show children, teammates, homes or club facilities.
How the tool helps
The Video Speed Controller plays files locally. It does not upload, store or share them.
Good practice
- Ask permission before recording others.
- Store clips securely and delete them when no longer needed.
- Follow your club's rules about recording minors.
Coaching responsibly
Video supports coaching
Slow review helps you see what happened and discuss it with a coach.
It does not replace expertise
Video review is not a substitute for a qualified coach, physiotherapist or doctor, especially if you have pain or an injury.
Avoid over-analysis
Small details can look dramatic at 0.25×. Focus on the main patterns.
Troubleshooting
Slow motion looks jerky
The recording frame rate is probably 30 fps. Record at 60 fps or higher, or use 0.5× instead of 0.25×.
The file will not play
Convert to MP4 (H.264 + AAC) or change your camera settings.
Playback stutters
Large 4K files need more power. Use 1080p for review.
Equipment that helps
A simple tripod or mount
A small phone tripod keeps footage steady and makes comparisons between sessions easier.
Consistent markers
Place a cone or tape mark where the camera stands so you can film from the same spot each time.
Spare storage
High frame-rate video uses more storage. Free up space before a session.
Organising your clips
Name files clearly
Use names such as "2026-11-14 serve side view.mp4" so you can find and compare clips later.
Keep folders by skill
Create folders for each skill, such as serve, forehand or footwork.
Delete clips you no longer need
Keep the most useful clips and delete the rest to save space and protect privacy.
Reviewing with a coach or teammate
Prepare the clip
Load the clip in the Video Speed Controller before the conversation and set the speed to 0.5×.
Point out one thing at a time
Pause on a position and discuss one point before moving on.
Agree on an action
End each review with one clear thing to practise.
What to look for in movement review
Starting position
Check posture, balance and alignment before the movement begins.
Sequence
Look at the order in which body parts move. Many techniques depend on a smooth sequence from legs to hips to shoulders to arms.
Key moment
Study the moment of contact, release or landing at 0.25×.
Finish
Check balance and follow-through after the movement.
Using loop effectively
Short loops
Loop only the few seconds around the movement so you are not waiting through unrelated footage. Trim long recordings into shorter clips if possible.
Watch without pausing
Let the loop play several times while you watch one body part, such as the feet, then the hips, then the arms.
Change speed while looping
Start at 0.5× and switch to 0.25× while the loop continues. The change applies instantly.
Safety reminders
- Warm up before recording repeated attempts.
- Do not repeat a movement many times just to get a good clip if you are tired.
- Stop if anything hurts and seek advice from a qualified professional.
A sample 30-minute review session
| Time | Activity |
|---|---|
| 0–5 min | Load the best three clips; watch each at 1× |
| 5–15 min | Loop clip 1 at 0.5×, then 0.25× around the key moment |
| 15–20 min | Repeat for clips 2 and 3 |
| 20–25 min | Compare with a reference video at the same speed |
| 25–30 min | Write one focus point for the next practice |
Simple drills to pair with video review
Mirror drill
Watch a model movement at 0.5× and copy it in slow motion without equipment.
Freeze-and-hold drill
Pause at a key position with K, copy that position and hold it for a few seconds to feel it.
Speed ladder drill
Practise the movement at a slow pace, then increase pace gradually, just as you increase video speed with D from 0.5× towards 1×.
Reviewing game footage
Use normal or fast speed first
For tactical review, such as positioning and movement off the ball, watch at 1× or 1.5× to understand the flow.
Slow down for decisions
Slow to 0.5× around key decisions, such as a pass or a tackle, and pause to discuss options.
Keep sessions short
Long tactical sessions are tiring. Focus on a few key moments per session.
Using normal-speed review too
Rhythm and timing
Some aspects of technique, such as rhythm and overall timing, are easier to judge at 1×. Slowing down can make a movement look more controlled than it really is.
Alternate between speeds
A good pattern is: watch at 1×, then 0.5×, then 0.25× for the key moment, then 1× again. The final normal-speed view connects the details to the whole movement.
Faster review of drills
For long drill sessions, use 1.5× or 2× to find the best repetitions quickly, then slow down to study them.
Understanding what video cannot show
Forces and effort
Video shows positions and timing, but not muscle effort, balance sensations or forces. Combine what you see with what you feel.
Single camera angles
One angle can hide important details. When possible, film from two angles in separate clips.
Lens distortion
Wide-angle phone lenses can distort body angles near the edges of the frame. Keep the athlete near the centre.
Key takeaways
- Record short, steady clips at 60 fps or higher.
- Watch at 1× first, then 0.5× with loop, then 0.25× for key moments.
- Pause on positions with K and compare with a reference.
- Focus on one improvement at a time.
- Protect privacy and get permission before recording others.
- Video review supports coaching but does not replace it.
Frequently asked questions
Can I mark positions on the video?
Not at the moment. Pause the video and take a screenshot with your device if you need a still image.
Can I compare two videos side by side?
The tool plays one video at a time. Open the site in two browser windows to compare clips.
Can I save the slow-motion clip?
No. The tool changes playback only. Use a video editor to export a slow-motion file.
What frame rate should I record at?
60 fps is a good balance between smooth slow motion and file size. Higher frame rates look smoother but use more storage.
Can I review videos on my phone at the training ground?
Yes. Open the site in your phone's browser and choose the clip from your gallery.
Is my training video uploaded anywhere?
No. Your video is processed in this browser. The video file is not uploaded to our server.
Can I use footage recorded by someone else?
Only with their permission, and follow your club's rules, especially when minors are involved.
How long should my clips be?
Short clips of 5 to 20 seconds are ideal for loops and comparisons. Trim long recordings into shorter clips if possible.
Is 0.25× slow enough for fast sports?
For most review, yes. For extremely fast movements, record at a high frame rate so slowed playback stays smooth.
Can I watch clips in fullscreen?
Yes. Press F or the fullscreen button. The speed badge remains visible in the corner.
Can I use the tool for dance or music practice too?
Yes. The same workflow of slow playback, loop and pausing works for any movement-based skill, including dance, martial arts, yoga and instrument technique. Start at 0.5× and raise the speed as the movement becomes familiar.
Summary
Record short, steady clips at a high frame rate, load them into the Video Speed Controller, watch at 1×, slow to 0.5× with loop, focus on key moments at 0.25× and pause on important positions. Your clips stay private on your device.
Try it with your own video – nothing is uploaded.
Open the Video Speed Controller